
In the digital age, databases play a pivotal role in storing and managing data for various applications. While traditional methods often involve using a command-line interface to create and manage databases, DirectAdmin offers a more user-friendly graphical approach. In this guide, we’ll provide a step-by-step walkthrough on how to create, manage, and delete MySQL databases using DirectAdmin.
Creating a MySQL Database in DirectAdmin:
Step 1: Accessing DirectAdmin: Begin by logging into the DirectAdmin control panel. You can do this by visiting:
- https://your-domain.com:2222
- Alternatively, use:
- https://IP-address:2222
- https://server-hostname:2222

Step 2: Navigating to MySQL Management: Once logged in, head over to Account Manager and then select MySQL Management.

Step 3: Creating the Database:
- Click on the CREATE NEW DATABASE button.
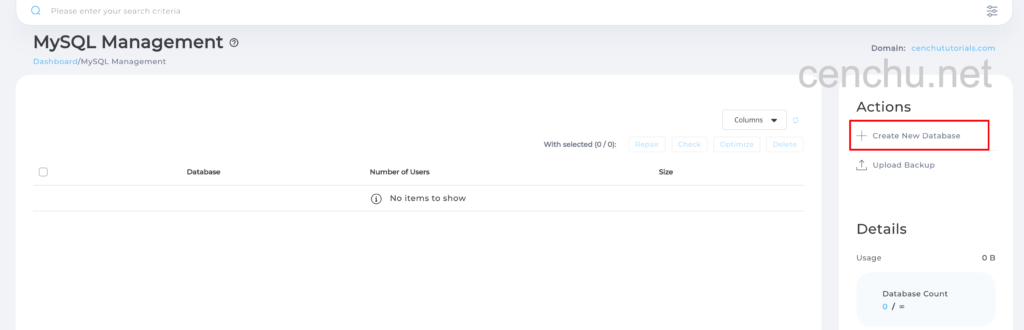
- Input your desired database name.
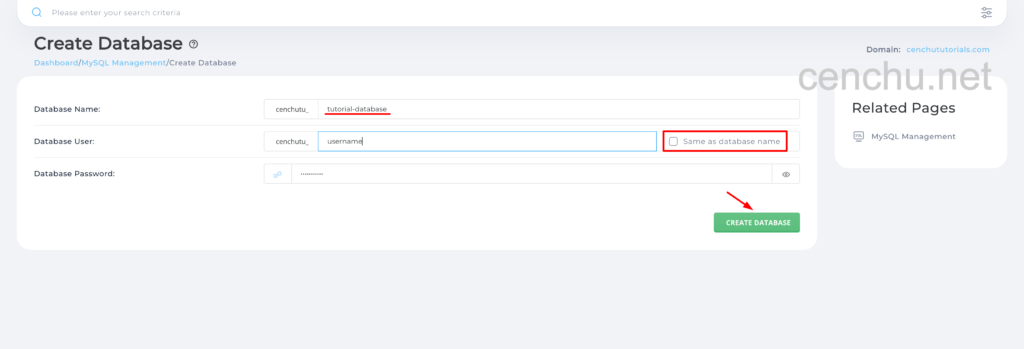
- To create a new user for the database, deselect the option “Same as database name”, then enter the desired username and configure the password.
- Confirm by clicking on CREATE DATABASE.
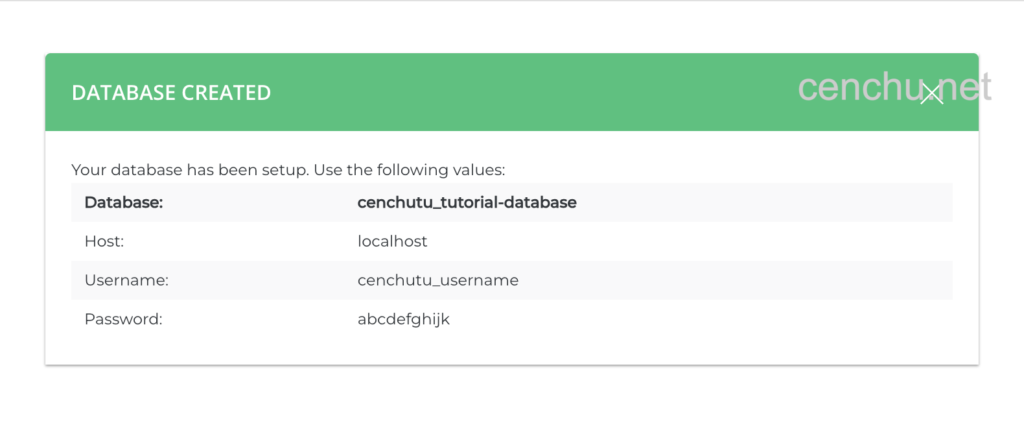
Step 4: Success: Congratulations! You’ve successfully set up a MySQL database and its user in DirectAdmin.
Deleting a MySQL Database in DirectAdmin:
Step 1: Deleting the Database:
- Locate and select the database you wish to remove.
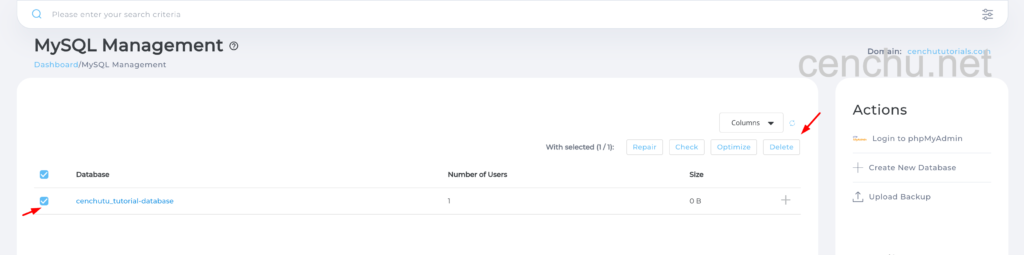
- Click on the Delete button.
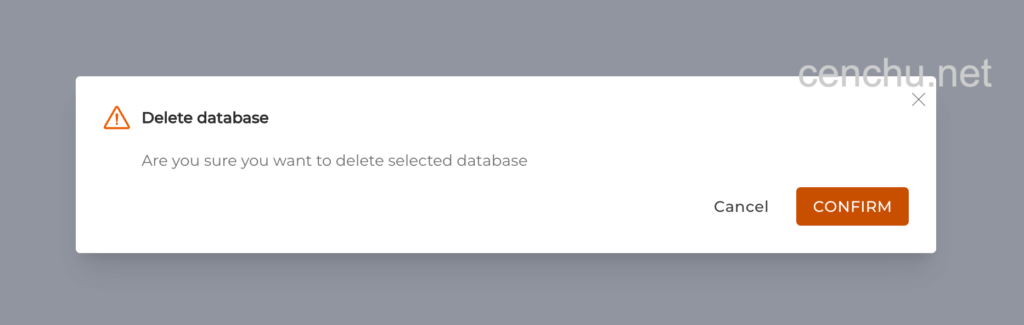
- A confirmation prompt will appear. Confirm the deletion.
Step 2: Success: Congratulations! You’ve successfully deleted the selected MySQL database.

Conclusion:
With DirectAdmin, creating and managing MySQL databases is a seamless process. This guide offers a straightforward, step-by-step approach to help you set up and manage your databases efficiently.
At Cenchu, our commitment to excellence ensures that you receive top-tier support every day of the year. Our dedicated team is always ready to assist you with any hosting-related queries or challenges. If you’re not yet a part of the Cenchu family, reach out to our Sales team to discover how we can enhance your web hosting journey.