
At Cenchu, we prioritize making your web hosting experience as smooth as possible. One of the foundational steps in establishing your online presence is setting up your domain. With DirectAdmin control panel, this process is both intuitive and efficient. In this guide, we’ll provide a step-by-step walkthrough on how to set up your domain using DirectAdmin.
Steps to Set Up a Domain in DirectAdmin:
Step 1: Access DirectAdmin: Start by logging into your DirectAdmin control panel.

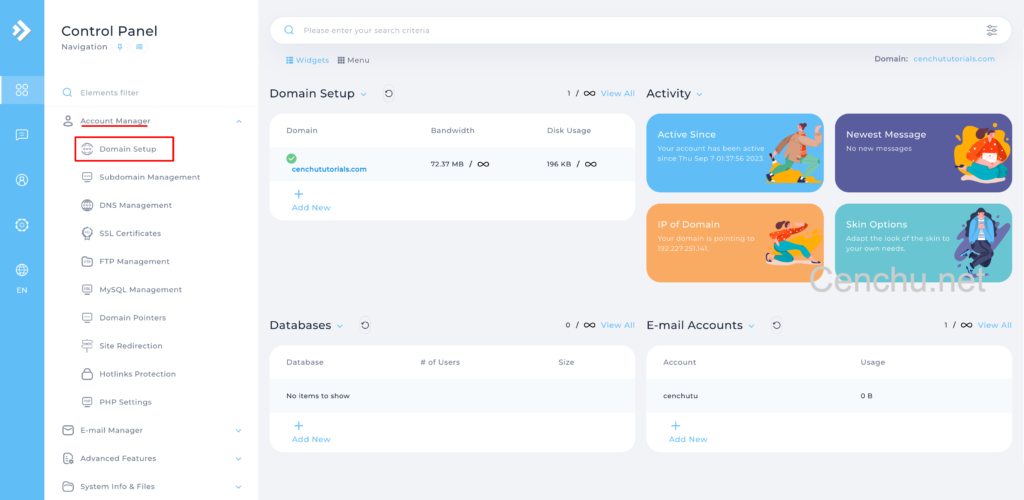
Step 2: Domain Setup: Once logged in, locate and click on the Domain Setup icon, which can be found under the Account Manager section.
Adding a New Domain:
- If you’re looking to add a new domain, click on the Add New icon.
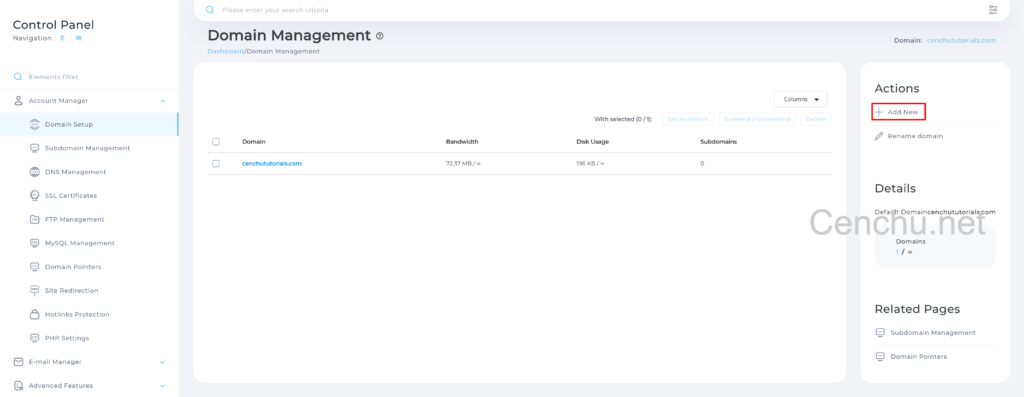
- Proceed to input the necessary domain details.

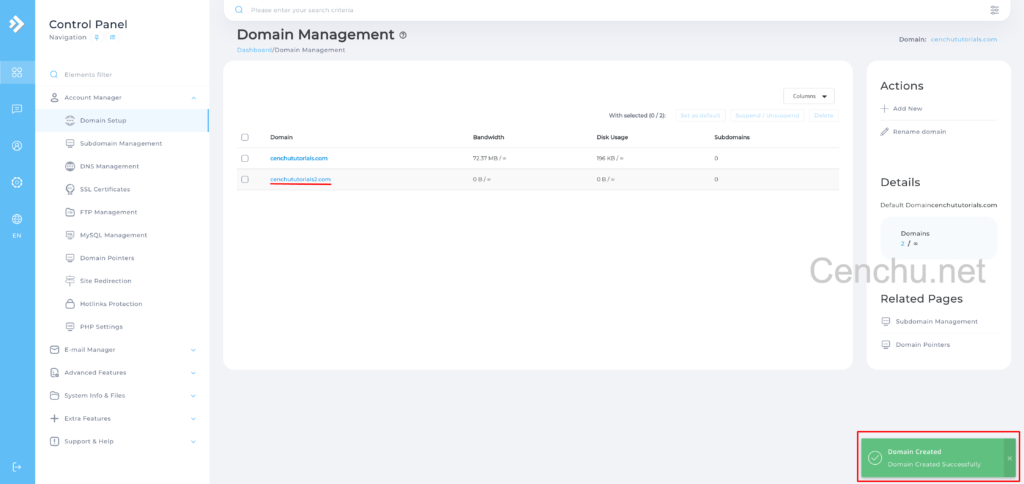
- Once done, click the Create button to finalize the addition. It shows the success message as shown below.
Renaming Your Domain:
- If you wish to change the name of your domain, click on the Rename Domain icon.

- Enter the new domain name you desire.
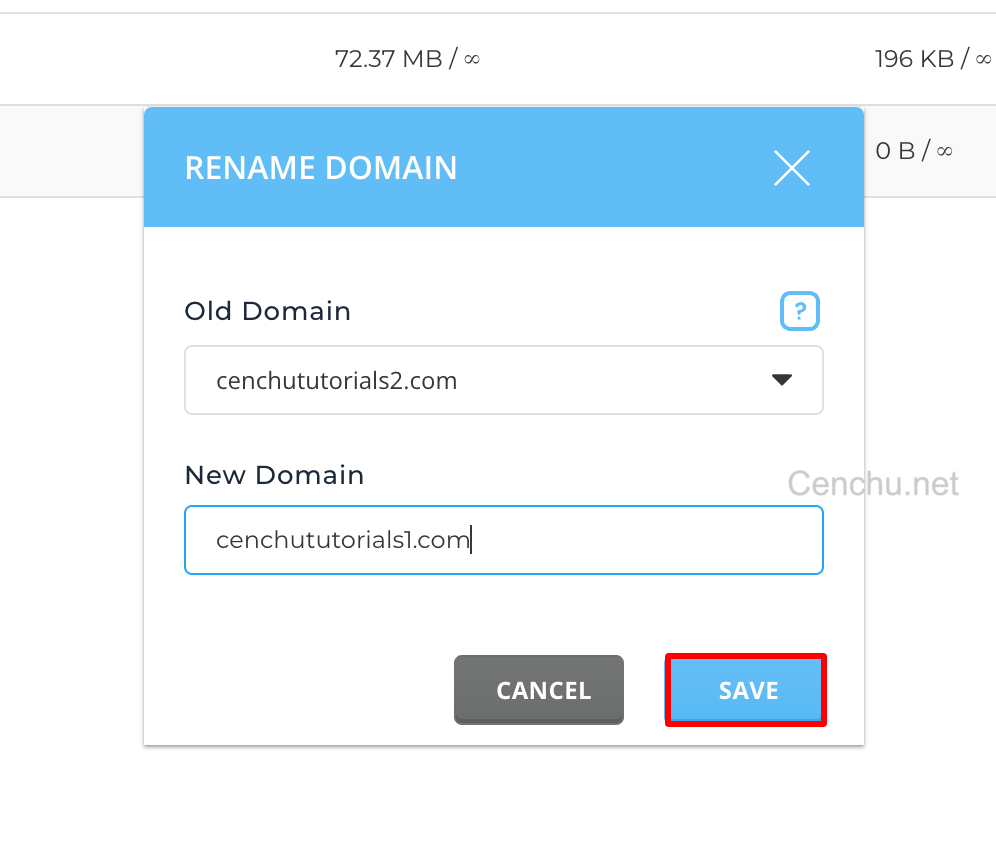
- Confirm the change by clicking the Save button. It shows the success message as shown below.

Managing Your Domain:
- To suspend or unsuspend a domain, select the desired domain and click on the Suspend/Unsuspend button.
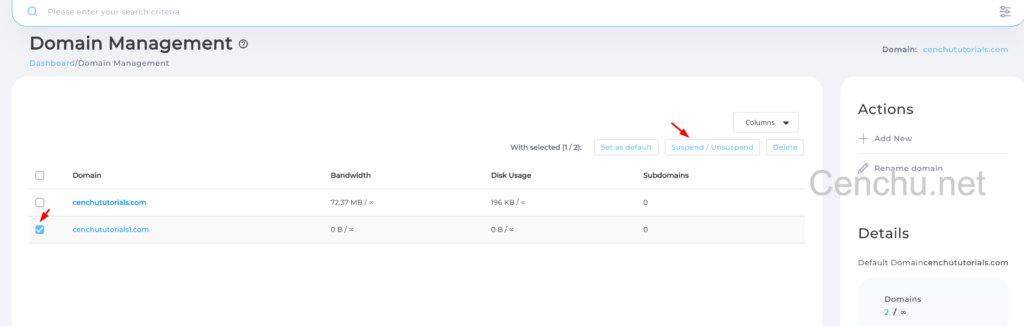
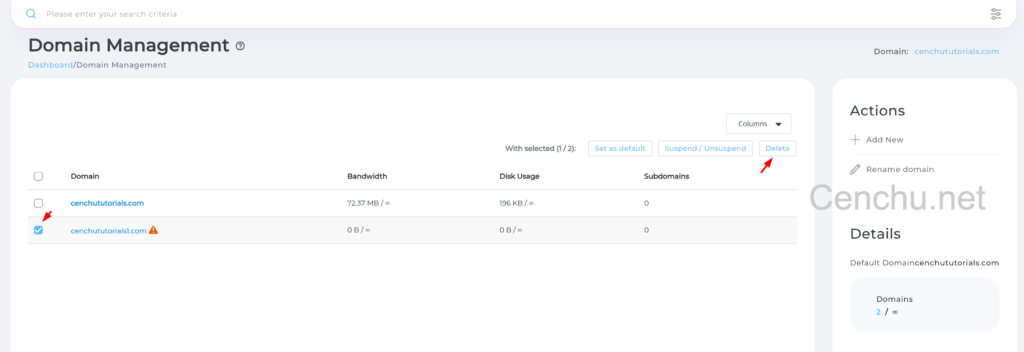
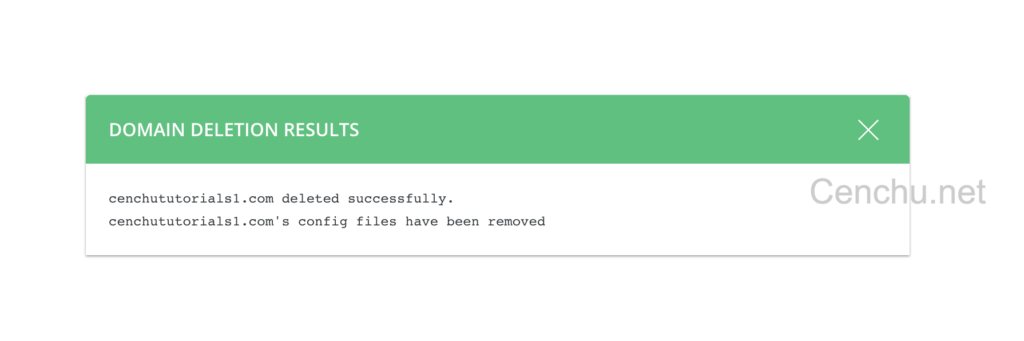
- If you need to delete a domain, simply select the domain and hit the Delete button. After deletion, the success message is shown on a pop-up.
Conclusion:
Setting up and managing domains in DirectAdmin is straightforward with our comprehensive guide. Whether you’re adding, renaming, or managing domains, DirectAdmin’s user-friendly interface ensures a hassle-free experience.
Should you encounter any challenges or have further questions, our dedicated Cenchu support team is always on standby to assist. Feel free to reach out to us anytime for unparalleled assistance.